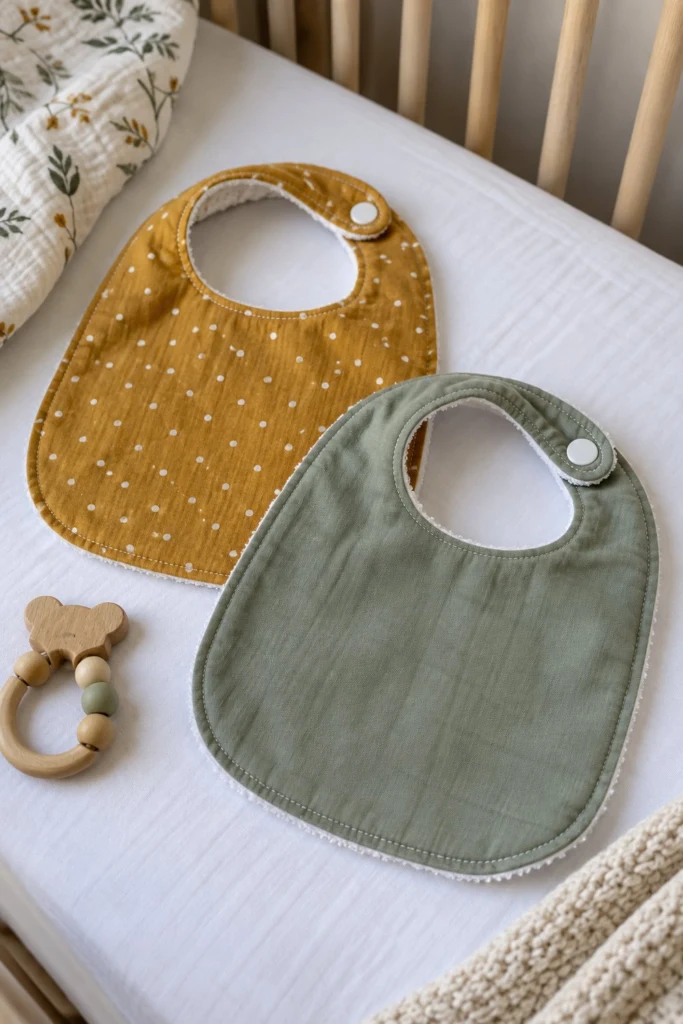
Baby bibs are one of those quick projects where you get instant satisfaction at the sewing machine. This one has a soft cotton front with tiny white polka dots, a cozy terry cloth back to catch every little spill, and a KAM plastic snap that stays put when a baby pulls on it. The curved shape is simple to draw yourself with a dinner plate, so you do not need to print any paper templates.
Quick Facts
- Skill level: Beginner friendly
- Finished size: 8 1/2 in wide by 11 in high (21.5 cm x 28 cm)
- Fabric: Mustard yellow cotton with white polka dots for the front, white cotton terry cloth for the back
- Seam allowance: 1/4 in (6 mm)
- Time to make: 30 minutes
- Machine needed: Standard sewing machine (hand sewing works too for finishing, but a machine makes it sturdy)
What Makes This Baby Bib Special
The classic teardrop shape covers a baby’s chest comfortably without getting in the way of their arms. Using absorbent terry cloth on the back stops droop and spills from soaking through to their clothes, while the topstitching around the outer edge keeps the layers flat after washing. The single plastic snap adjusts easily and holds much firmer than velcro that loses its stick in the laundry.
Finished Size
| Dimension |
Inches |
Centimetres |
| Width (widest part) |
8 1/2 in |
21.5 cm |
| Height (top of shoulder to bottom hem) |
11 in |
28 cm |
| Neck opening width |
4 in |
10 cm |
Materials You Will Need
| Material / Notion |
Amount |
Notes |
| Mustard dot cotton fabric |
1/3 yd (0.3 m) |
For the front panel |
| White cotton terry cloth |
1/3 yd (0.3 m) |
For the back absorbent layer |
| KAM plastic snap set |
1 set (1 cap, 1 socket, 1 stud) |
White or matching colour |
| Matching all-purpose thread |
1 spool |
Polyester or cotton |
Tools: Sewing machine, fabric scissors, pins or sewing clips, a dinner plate (about 10 in / 25 cm across), a marker, and a KAM snap pliers tool.
Cutting List
Seam allowance is 1/4 in (6 mm) and is included in the cut sizes below.
| Piece |
Fabric |
Cut Size W x H |
How Many |
| Bib Front |
Mustard dot cotton |
10 in x 12 in (25.5 cm x 30.5 cm) |
Cut 1 using template |
| Bib Back |
White terry cloth |
10 in x 12 in (25.5 cm x 30.5 cm) |
Cut 1 using template |
Before You Start
Pre-wash and dry your cotton and terry cloth fabrics so any initial shrinkage happens before you sew. Press your cotton fabric flat with an iron, but leave the terry cloth soft without heavy pressing. To make your bib template, trace a 10 in (25 cm) dinner plate onto a piece of paper or cardstock. At the top of the circle, draw a neck curve that is 4 in (10 cm) wide and drops down 2 in (5 cm), then blend the shoulders smoothly into the circle. Cut out this paper pattern.
Step-by-Step Instructions
Step 1: Cut the fabric pieces
Place your paper bib template on top of the mustard dot cotton fabric, pin it in place, and cut around the edges. Repeat the same process with the white terry cloth to cut out the back piece.
✅ Checkpoint: You should now have two identical bib-shaped pieces: one in dot cotton and one in terry cloth.
Step 2: Pin right sides together
Lay your mustard dot cotton piece down on your table with the right side facing up. Place the terry cloth piece directly on top of it with the right side (loop side) facing down. The two right sides of the fabric are now facing each other. Pin all the way around the outer edge, leaving the neck opening unpinned.
Step 3: Stitch the outer seam
Take your pinned pieces to the sewing machine. Sew all the way around the outer edge using a 1/4 in (6 mm) seam allowance. Start at one side of the neck opening, sew down around the bottom curve, and stop at the other side of the neck opening.
⚠️ Note: Leave the entire neck opening unstitched so you have a gap wide enough to turn the bib right side out. Backstitch at the start and finish to secure your stitches.
Step 4: Clip the curves
Using your scissors, carefully clip tiny notches into the curved seam allowance around the bottom of the bib, taking care not to cut through your stitching line. This removes bulk so the curved edge lies flat once turned.
Step 5: Turn the bib right side out
Reach through the open neck curve and gently pull the fabrics right side out. Use a blunt tool like a knitting needle or a chopstick to push out the rounded edges smoothly from the inside. Press the edges flat with your iron on the cotton side. Fold the raw edges of the neck opening inward by 1/4 in (6 mm) so they match the sewn seam, and press them flat. Pin the neck opening closed.
✅ Checkpoint: The turned bib should measure 8 1/2 in (21.5 cm) across the widest part and 11 in (28 cm) from top to bottom.
Step 6: Topstitch the edge
Take the bib back to your sewing machine. Topstitch all the way around the outer edge about 1/8 in (3 mm) from the seam. This neatens the edge and catches the folded neck opening closed in one go.
Step 7: Attach the plastic snap
Find the two back neck tabs of the bib. Use an awl or the pointed end of a seam ripper to poke a small hole through the center of one shoulder tab, pushing through both fabric layers. Insert the cap of the KAM snap through the hole from the front, place the socket piece on the back side, and squeeze it firmly using your KAM snap pliers. Repeat on the opposite shoulder tab using the stud piece so the two tabs overlap comfortably when snapped together around a baby’s neck.
Finishing
Clip any loose thread tails close to the fabric. Give the finished bib one final press with your iron on the cotton side to make it look crisp and ready for gifting.
Size and Fabric Variations
- Larger toddler bib: For a bigger coverage area, draft your template using an 11 in (28 cm) plate instead, cutting your fabric pieces 11 in x 13 in (28 cm x 33 cm).
- Double cotton version: If you prefer a lighter weight bib without terry cloth, substitute the back layer with a soft flannel or a second piece of quilting cotton.
Care Instructions
Machine wash in warm water with similar colours. Tumble dry on low heat or line dry. Touch up with a warm iron if needed, but avoid pressing directly over the plastic snap.
FAQ
Can I use regular metal snaps instead of KAM plastic snaps?
Yes, metal prong snaps or sew-on metal snaps work just as well if you do not have plastic snap pliers.
Why do I need terry cloth on the back?
Terry cloth is highly absorbent, which stops liquids from soaking straight through the bib onto the baby’s clothes underneath.
Can I make the neck opening smaller or larger?
You can adjust the neck curve depth on your paper template before cutting if you are making this for a newborn or a toddler.
Happy Sewing!
I hope you enjoy stitching up this sweet little bib for your own little one or as a handmade gift. If you make one, please save the pin on Pinterest. If you make one, I would love to see it: send me a photo through the contact page.