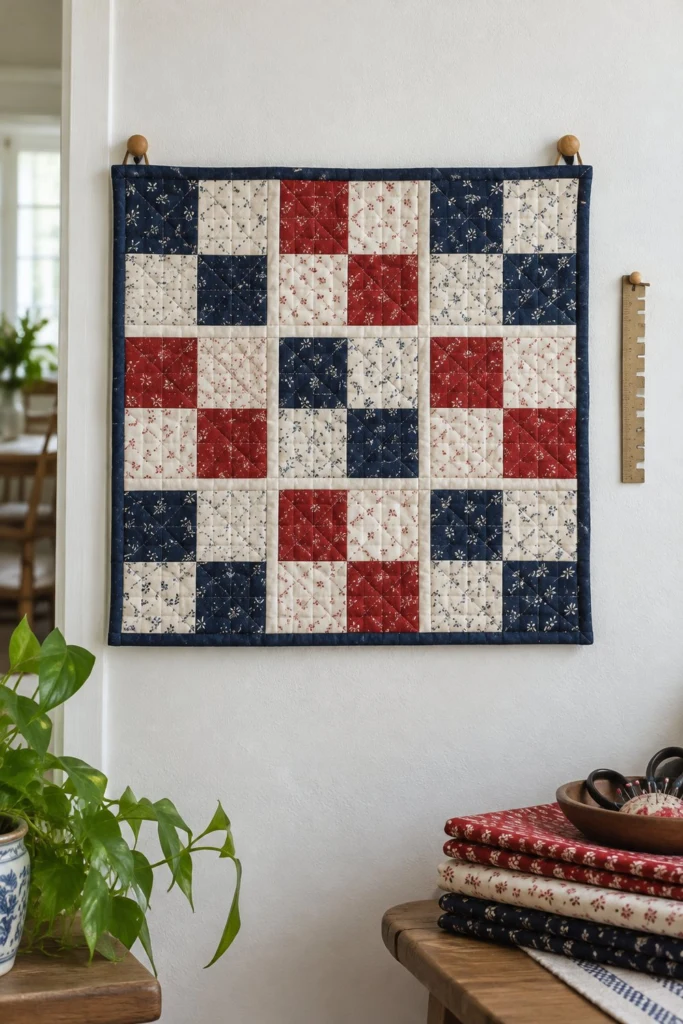
The quilt I use to teach the quarter-inch seam: if your four-patches measure right, you’re ready for anything. This sweet mini quilt wall hanging brings together simple red, navy, and cream floral prints in a neat nine-block grid that looks right at home hanging from wooden pegs in a country kitchen or sewing room.
Quick Facts
Skill level: Beginner
Finished size: 18 x 18 in (46 x 46 cm)
Block size: 6 in finished (6 1/2 in unfinished)
Fabric: 100% cotton quilting fabric
Seam allowance: 1/4 in
Time to make: A weekend afternoon
What Makes This Mini Quilt / Wall Hanging Special
This little wall hanging is built for practice without the pressure of a bed-sized quilt. Every block is a classic four-patch, which means you get nine identical chances to nail your quarter-inch seam. The navy binding frames the crisp red-and-cream and navy-and-cream blocks, and simple diagonal quilting lines pull the whole piece together.
Finished Size
| Item |
Size (Inches) |
Size (Centimetres) |
| Mini quilt top |
18 x 18 in |
46 x 46 cm |
| Nine four-patch blocks |
6 x 6 in each |
15 x 15 cm each |
| Block arrangement |
3 blocks across x 3 blocks down |
3 blocks across x 3 blocks down |
Fabric Requirements
| Fabric |
Used For |
Yards (42 in WOF) |
Metres |
| Red floral |
5 blocks (red squares) |
1/8 yd |
0.2 m |
| Navy floral |
4 blocks (navy squares) + binding |
3/8 yd |
0.35 m |
| Cream floral |
All blocks (cream squares) |
1/4 yd |
0.25 m |
| Backing |
Quilt back |
3/4 yd |
0.7 m |
| Batting |
Middle layer |
26 x 26 in |
66 x 66 cm |
Cutting Instructions
Before you cut into your good fabric, let’s run a quick test. Sew three 2 1/2 in x 6 in scrap strips together along the long edges using your 1/4 in foot. Measure the middle strip; the unit must measure exactly 6 1/2 in wide. If it does not, adjust your needle position or guide until it hits that mark every time.
- Red floral: Cut 1 strip 3 1/2 in x width of fabric (WOF). Subcut into 10 squares 3 1/2 x 3 1/2 in (9 x 9 cm).
- Navy floral: Cut 1 strip 3 1/2 in x width of fabric (WOF). Subcut into 8 squares 3 1/2 x 3 1/2 in (9 x 9 cm). Cut 3 binding strips 2 1/2 in x width of fabric (WOF).
- Cream floral: Cut 2 strips 3 1/2 in x width of fabric (WOF). Subcut into 18 squares 3 1/2 x 3 1/2 in (9 x 9 cm).
- Backing: Cut 1 square 26 x 26 in (66 x 66 cm).
Assembly
Block Assembly
We are making five red-and-cream blocks and four navy-and-cream blocks.
- Lay out four squares for your first block: two cream squares and two red squares, alternating them in a checkerboard pattern.
- Place the top-left square right sides together with the top-right square. Sew along the right edge using a 1/4 in seam allowance. Repeat for the bottom row with the remaining two squares.
- Press the seam allowances toward the darker fabric (the red square).
- Place the top row and bottom row right sides together, nesting the center seams so they lock tight against each other. Pin in place.
- Sew across the edge using a 1/4 in seam. Press the center seam open or to one side.
✅ Checkpoint: The unfinished block must measure 6 1/2 x 6 1/2 in (16.5 x 16.5 cm) square. Trim any tiny dog ears if needed.
- Repeat this process to make a total of five red-and-cream blocks and four navy-and-cream blocks.
Quilt Top Assembly
- Arrange your nine blocks on a flat surface in a 3 x 3 grid. Place a navy-and-cream block in the center, and alternate red-and-cream and navy-and-cream blocks around it so no two identical block types touch edges.
- Sew the three blocks in each row together, pressing seams in alternating directions from row to row so they nest neatly.
- Sew the three rows together to complete the quilt top, matching all intersecting seams. Press the row seams open.
✅ Checkpoint: The finished quilt top should measure 18 x 18 in (46 x 46 cm) square.
Quilting and Binding
- Lay your 26 x 26 in (66 x 66 cm) backing fabric face down, place the batting on top, and center your quilted top right side up over both. Smooth outward from the center and pin or baste the three layers together.
- Quilt as desired. Simple diagonal lines running corner to corner through each four-patch block look classic and hold the layers securely. Trim the excess batting and backing even with the raw edges of the quilt top.
- Join your three 2 1/2 in navy binding strips end to end on the diagonal to make one long strip. Fold it in half lengthwise wrong sides together and press.
- Sew the binding to the front of your quilt using a 1/4 in seam allowance, mitering the corners as you go. Fold the binding over to the back and hand-stitch it down securely with matching thread.
Size Variations
Because this mini quilt is built on a simple 3 x 3 grid of 6 in blocks, you can easily grow the design. Add a fourth row and fourth column of blocks to make a 24 x 24 in (61 x 61 cm) wall hanging, or keep going to make a full doll quilt. Just recalculate your block count and fabric yardage accordingly.
Care Instructions
Wash your finished mini quilt by hand in cold water with a gentle detergent if it ever needs freshening up. Lay flat to shape and dry away from direct sunlight.
FAQ
Why do my four-patch blocks come out smaller than 6 1/2 inches?
Your seam allowance is likely just a thread too wide. Even a tiny variance across four squares adds up. Slow down and check that your fabric edge runs right along the 1/4 in mark on your machine’s throat plate.
Can I use fat quarters instead of yardage for the blocks?
Yes. If you have fat quarters in your stash, you can cut your 3 1/2 in squares easily from them, keeping in mind that an 18 x 21 in fat quarter gives you plenty of room for these small cuts.
What is the best way to hang a mini quilt?
You can sew a small fabric sleeve to the upper back corners of the mini quilt and slip a thin wooden dowel or a decorative branch through it, or hang it directly from wooden clips attached to wall pegs as shown in the photo.
Happy Quilting!
I hope this little pattern gives you all the practice and confidence you need to tackle any pieced project that comes your way. Save this pin on Pinterest so you can find it whenever you need a quick afternoon project, and send me a photo of your finished mini quilt through my contact page—I love seeing your fabrics come to life.
– Vera