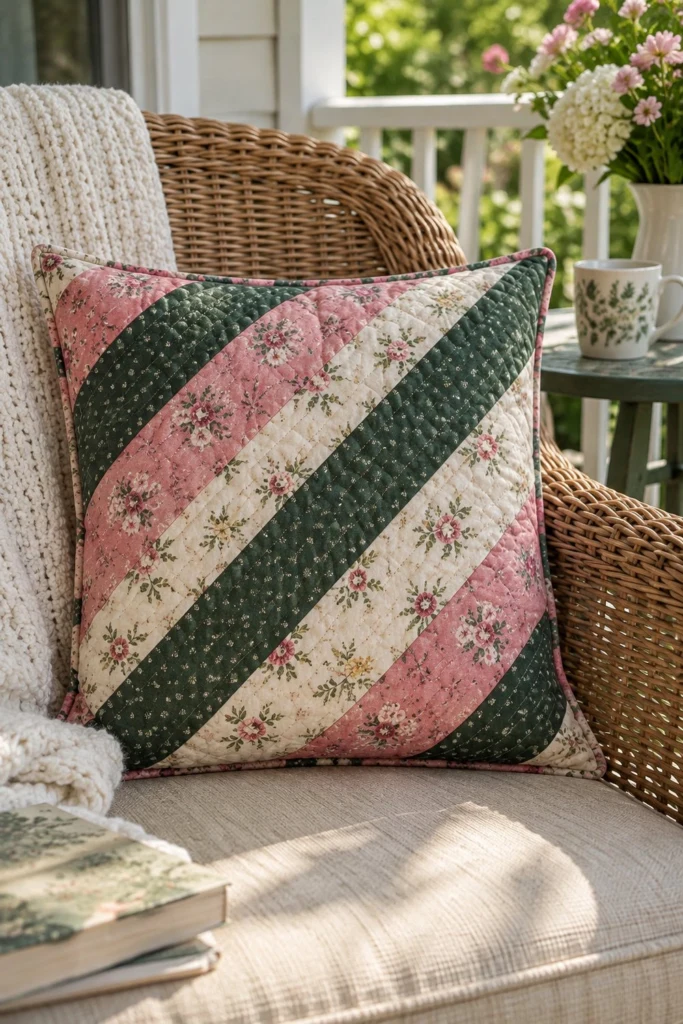
This quilted pillow cover lets you practice the quilt-as-you-go method without a large time investment, building the front by sewing strips straight onto a backing and batting foundation. The mix of pink floral, dark green dot, and cream floral fabrics creates a warm, traditional cottage look that is right at home on a porch rocking chair or living room sofa.
Quick Facts
- Skill level: Confident beginner
- Finished size: 18 x 18 in (46 x 46 cm) for an 18 in pillow form
- Block size: Diagonal strip piecing
- Fabric: Quilting cottons (pink floral, dark green dot, cream floral)
- Seam allowance: 1/4 in
- Time to make: 2 to 3 hours
What Makes This Quilted Pillow Cover Special
The diagonal strip layout goes together much faster than traditional patchwork blocks because the quilting lines happen naturally as you sew each strip down. The envelope back makes it easy to slip the pillow form in and out for washing without fussing with zippers or buttons.
Finished Size
| Item |
Size (inches) |
Size (cm) |
| Finished Pillow Cover |
18 x 18 in |
46 x 46 cm |
| Front Foundation |
20 x 20 in |
51 x 51 cm |
| Trimmed Front |
18 1/2 x 18 1/2 in |
47 x 47 cm |
Fabric Requirements
| Fabric |
Used For |
Yards |
Metres |
| Pink floral |
Strips (3) & envelope back: 7 1/2 in + 13 in = 20 1/2 in |
5/8 yd |
0.6 m |
| Dark green dot |
Strips (2) |
1/4 yd |
0.3 m |
| Cream floral |
Strips (2) |
1/4 yd |
0.3 m |
| Muslin |
Base foundation |
5/8 yd |
0.6 m |
| Batting |
Cushion batting |
20 x 20 in |
51 x 51 cm |
💡 Designer Tip: Fat quarters work just as well as yardage for the pink, green, and cream strip fabrics, as long as they measure at least 18 x 21 in.
Cutting Instructions
- Muslin base: Cut 1 square 20 x 20 in (51 x 51 cm).
- Batting: Cut 1 square 20 x 20 in (51 x 51 cm).
- Pink floral fabric: Cut 3 strips 2 1/2 in x WOF (Width of Fabric) for a total length of 7 1/2 in. (Cut 2 pieces 18 1/2 x 13 in (47 x 33 cm) for the envelope back panels).
- Dark green dot fabric: Cut 2 strips 2 1/2 in x WOF for a total length of 5 in.
- Cream floral fabric: Cut 2 strips 2 1/2 in x WOF for a total length of 5 in.
Assembly
Quilt-As-You-Go Front Assembly
- Lay your 20 x 20 in (51 x 51 cm) piece of batting flat on your work table, and place the 20 x 20 in (51 x 51 cm) muslin square right on top of it. Smooth them together with your hands.
- Find the exact center of your square foundation. Lay your first strip (let us start with a cream floral strip) right side up across the center diagonal line from corner to corner. Pin it in place.
- Take your next strip (choose a pink floral strip), place it right sides together along one long raw edge of the first strip, and align the raw edges.
- Sew a 1/4 in seam along that edge through the strip, muslin, and batting all at once. This stitches the strip down and quilts it in a single step.
- Flip the pink strip open so it is right side up, and press it flat with your fingers or a small iron.
- Continue adding strips working outward toward the corners: alternate your dark green dot, cream floral, and pink floral strips until the entire muslin and batting square is covered. Make sure the fabric extends past all four outer edges of the 20 x 20 in square.
-
✅ Checkpoint: Your quilted square is fully covered with diagonal strips and measures at least 20 x 20 in with batting and muslin backing.
- Place your quilted square face down on a cutting mat. Using a rotary cutter and a long ruler, trim the excess batting and backing fabric away so the front panel measures exactly 18 1/2 x 18 1/2 in (47 x 47 cm).
Envelope Back Assembly
- Take your two 18 1/2 x 13 in (47 x 33 cm) pink floral back pieces and lay them on your table.
- On one 18 1/2 in long edge of each piece, fold the raw edge under 1/2 in (1.3 cm), press, and fold under 1/2 in (1.3 cm) again to enclose the raw edge completely. Pin in place.
- Sew a straight seam close to the inner folded edge to secure the double-turned hem on both back panels.
Pillow Finishing
- Lay your quilted pillow front right side up on your work surface.
- Place the first back panel right side down on top of the front, aligning the raw outer edges at the top, left, and right, with the hemmed edge running across the middle.
- Place the second back panel right side down over the bottom portion of the pillow front, aligning the outer edges. The two hemmed edges will overlap by about 5 1/2 in (14 cm) in the center.
- Pin all four outer edges securely through all layers.
- Sew all the way around the outer perimeter with a 1/4 in (0.6 cm) seam allowance, backstitching at the start and finish for strength.
- Clip all four corner tips carefully across the seam diagonal without cutting your stitches. This keeps the corners sharp when turned.
- Turn the pillow cover right side out through the overlapping back opening, pushing the corners out gently with a blunt tool.
-
✅ Checkpoint: Your finished pillow cover measures 18 x 18 in (46 x 46 cm) and is ready for your pillow form.
Size Variations
To make a larger 20 x 20 in (51 x 51 cm) pillow cover, cut your base muslin and batting squares to 22 x 22 in (56 x 56 cm), use extra WOF strips to cover the wider span, and trim the front down to 20 1/2 x 20 1/2 in (52 x 52 cm). Adjust your back envelope panels to match the new width.
Care Instructions
Machine wash cold on a gentle cycle with mild detergent. Tumble dry on low heat or lay flat to reshape and air dry. Warm iron if needed.
FAQ
Can I use scrap strips instead of cutting new yardage?
Yes, absolutely. Any strips that are at least 2 1/2 in (6.4 cm) wide and long enough to span the diagonal of your block will work nicely.
Do I need to quilt the pillow front separately before sewing the back?
No, the beauty of the quilt-as-you-go method is that the piecing seams automatically quilt the front fabric directly to the batting and muslin backing all at once.
Can I add a zipper instead of an envelope back?
You certainly can. If you prefer a zipper closure, cut your back pieces differently to install a standard or invisible zipper before sewing the front and back together.
Happy Quilting!
I hope you enjoy stitching up this sweet quilted pillow cover for your home. Save this pin on Pinterest so you can find it later, and feel free to send a photo of your finished pillow through my contact page—I love seeing what you make!