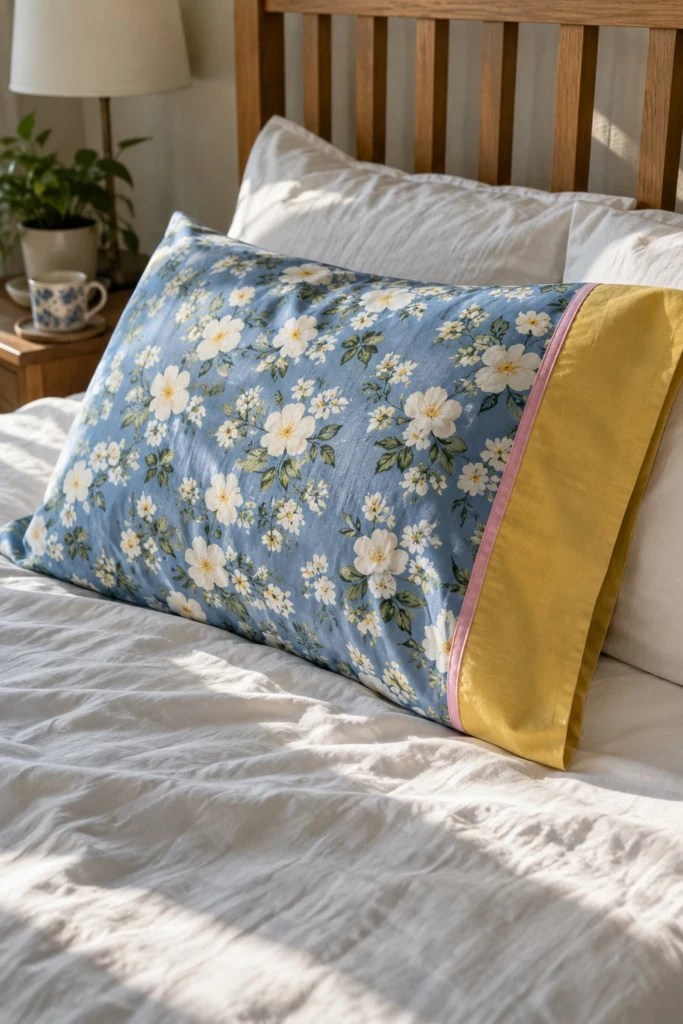
This burrito pillowcase has a cheerful blue and white floral body, a sunny yellow cuff, and a narrow pink accent band tucked between them. It is one of my very favourite projects because every raw edge is hidden inside the cuff and the side seams, leaving you with a tidy, professional finish inside and out.
Quick Facts
- Skill level: Beginner
- Finished size: Standard (20 in x 30 in) or Queen (20 in x 34 in)
- Fabric: Woven cotton, linen, or flannel
- Seam allowance: 1/2 in (1.3 cm) unless noted otherwise
- Time to make: 45 minutes
- Machine needed: Standard sewing machine
What Makes This Pillowcase Special
The burrito method sounds a bit silly, but it is a clever folding trick that rolls up your main body fabric and tucks it inside the cuff before you sew the final edge. When you pull everything right side out, you get clean enclosed seams with zero hand-stitching required. The slim pink accent strip gives it a neat pop of colour right where the cuff meets the floral fabric.
Finished Size
| Size |
Finished Width |
Finished Length |
| Standard |
20 in (51 cm) |
30 in (76 cm) |
| Queen |
20 in (51 cm) |
34 in (86 cm) |
Materials You Will Need
| Material / Notion |
Amount |
Notes |
| Blue floral fabric (Body) |
1 yd (0.9 m) |
Standard quilting cotton or linen |
| Yellow fabric (Cuff) |
3/8 yd (0.3 m) |
Solid cotton for the wide band |
| Pink fabric (Accent band) |
1/8 yd (0.1 m) |
Scraps or cut from yardage |
| Matching thread |
1 spool |
All-purpose polyester |
| Sewing tools |
Pins, scissors, iron |
Standard sewing kit |
Cutting List
Note: Seam allowance is 1/2 in (1.3 cm) unless stated otherwise.
| Piece |
Fabric |
Cut Size W x H in (cm) |
How Many |
| Pillow Body |
Blue floral |
21 in x 36 in (53 cm x 91 cm) |
1 |
| Cuff Band |
Yellow |
21 in x 9 in (53 cm x 23 cm) |
1 |
| Accent Strip |
Pink |
21 in x 2 in (5 cm x 5 cm) |
1 |
Before You Start
Wash and dry your fabrics before cutting so any initial shrinkage happens before you sew. Press all three pieces flat with a hot iron to remove creases. Lay your fabrics out on a large flat table and use a rotary cutter and clear ruler to keep your corners square.
Step-by-Step Instructions
Step 1: Lay Out the Strip Stack
Place your yellow cuff piece face up on your work table. Lay the pink accent strip right side up along the top long edge of the yellow piece, lining up the raw edges. Place the blue floral body piece face down on top of the stack, aligning the top raw edge with the pink and yellow edges.
✅ Checkpoint: You now have a neat stack with all three top raw edges pinned together: yellow on the bottom, pink in the middle, and blue on top.
Step 2: Roll the Burrito
Starting from the bottom long edge of the blue body fabric, roll the fabric upward into a tight, long sausage shape. Roll it up until you reach about 2 inches from the top pinned edge.
Step 3: Wrap the Cuff
Bring the bottom edge of the yellow cuff up and around your rolled blue fabric, wrapping it over the roll to meet the top raw edges. Pin all four layers together securely through the thickness: yellow cuff bottom, blue body roll, pink strip, and yellow cuff top.
Step 4: Stitch the Cuff Seam
Sew across the long pinned edge using a 1/2 in (1.3 cm) seam allowance. Take your time and make sure you do not accidentally catch any of the rolled fabric inside your stitching line.
💡 Designer Tip: Feel inside the roll as you sew to make sure the fabric stays safely out of the way of your needle.
Step 5: Pull Your Pillowcase Right Side Out
Reach inside the tube of fabric and gently pull the rolled blue body out from the inside of the cuff. Give the whole piece a strong tug, and watch the burrito magically unroll itself. Press the cuff and accent band flat with your iron.
Step 6: Fold and Pin the Sides
Fold your pillowcase in half with the wrong sides together, matching the raw side edge and the bottom closed edge. Pin along the side and bottom edges.
Step 7: Sew the First Seam
Sew along the side and bottom edges using a 1/4 in (0.6 cm) seam allowance. Trim the seam allowance down to 1/8 in (0.3 cm) with small scissors to keep things neat.
Step 8: Enclose the Seam
Turn the pillowcase inside out so the wrong sides are now facing out. Press the side and bottom seams flat. Sew a second seam along the side and bottom edges using a 3/8 in (1 cm) seam allowance, completely enclosing the raw edges inside a tidy French seam.
✅ Checkpoint: Your side and bottom seams should measure clean and flat with no raw threads showing on the inside.
Finishing
Turn your finished pillowcase right side out and press it one final time with your iron, paying special attention to the corners and the cuff edge.
Size and Fabric Variations
- For a Queen Size: Cut your blue body piece 21 in x 40 in (53 cm x 102 cm) and leave the cuff and accent strip sizes the same.
- For Flannel: If you use a soft flannel, grade your seams slightly closer to reduce bulk at the corners.
Care Instructions
Machine wash on a gentle cycle in cold water with similar colours. Tumble dry on low heat and remove promptly. Warm iron if needed.
FAQ
What is the burrito method?
It is a clever sewing technique that rolls up the main fabric body inside a cuff so you can sew it in one go, leaving zero exposed raw edges inside the cuff seam.
Can I skip the pink accent strip?
Yes, you can sew the yellow cuff directly to the blue body fabric if you prefer a simpler two-tone look.
Why use a French seam on the pillowcase?
French seams enclose all raw edges inside the seam itself, which stops fraying in the wash and makes the inside feel smooth against your face.
Happy Sewing!
I hope you love making this sweet pillowcase for your bed or as a thoughtful gift for a friend. Save this pin on Pinterest to find it easily later. If you make one, I would love to see it: send me a photo through the contact page.