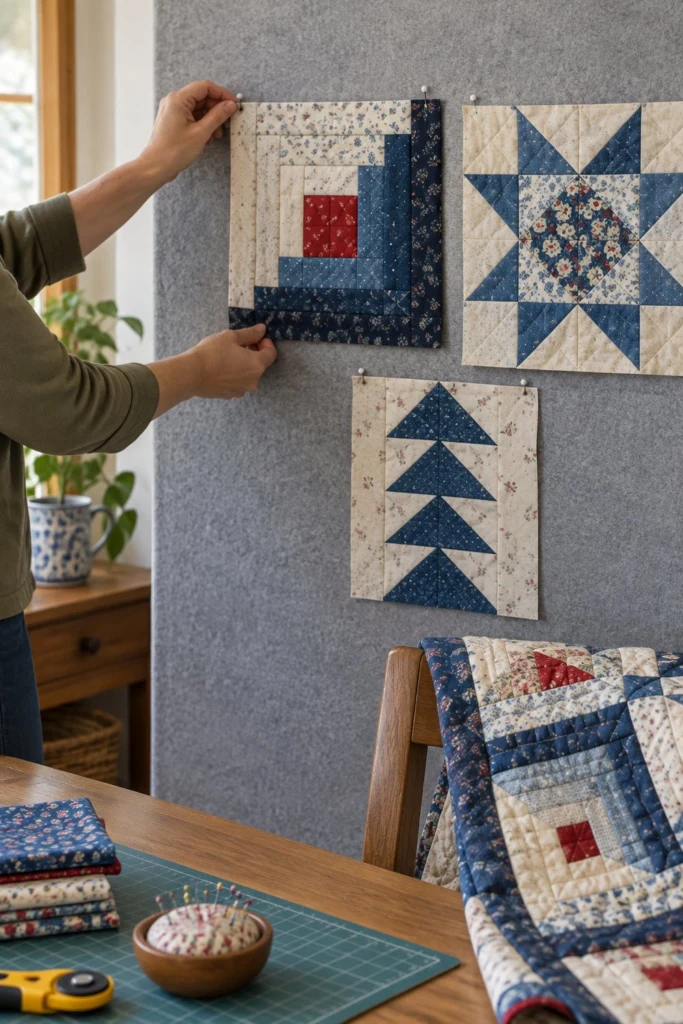
This Log Cabin quilt block features a bright red center square surrounded by classic dark navy blue and soft cream floral strips, just like the one pinned up on the design wall in my sewing room. It is a traditional block that comes together quickly once you get into the rhythm of adding the logs clockwise around the center.
Quick Facts
- Skill level: Confident Beginner
- Finished size: 12 in x 12 in (30.5 cm x 30.5 cm)
- Block size: 12 in x 12 in (30.5 cm x 30.5 cm) unfinished (12 1/2 in x 12 1/2 in with seam allowances)
- Fabric: Cotton quilting fabrics (scrappy creams and navy blues with a red center)
- Seam allowance: 1/4 in (0.6 cm)
- Time to make: 1 hour per block
What Makes This Log Cabin Quilt Block Special
The charm of this Log Cabin block is the light and dark contrast that splits the block diagonally, making the red center square pop right out. Each strip is added in a set order, building outward from the center square so the block grows evenly without stretching on the bias edges.
Finished Size
| Item |
Finished Size |
Unfinished Size |
| Quilt Block |
12 in x 12 in (30.5 cm x 30.5 cm) |
12 1/2 in x 12 1/2 in (31.8 cm x 31.8 cm) |
Fabric Requirements
| Fabric |
Used For |
Yards |
Metres |
| Red Floral |
Center square |
1/8 yd |
0.1 m |
| Cream Floral (Light) |
Logs 1, 2, 5, 6 (18 1/2 in total length) |
5/8 yd |
0.6 m |
| Navy Floral (Dark) |
Logs 3, 4, 7, 8 (27 in total length) |
3/4 yd |
0.7 m |
Cutting Instructions
- Red Floral: Cut 1 square 2 in x 2 in (5.1 cm x 5.1 cm).
- Cream Floral (Light):
- Cut 1 strip 1 1/2 in x WOF; subcut into 1 rectangle 1 1/2 in x 2 in (3.8 cm x 5.1 cm) [Log 1] and 1 rectangle 1 1/2 in x 3 in (3.8 cm x 7.6 cm) [Log 2].
- Cut 1 strip 1 1/2 in x WOF; subcut into 1 rectangle 1 1/2 in x 6 in (3.8 cm x 15.2 cm) [Log 5] and 1 rectangle 1 1/2 in x 7 1/2 in (3.8 cm x 19.1 cm) [Log 6].
- Navy Floral (Dark):
- Cut 1 strip 1 1/2 in x WOF; subcut into 1 rectangle 1 1/2 in x 3 in (3.8 cm x 7.6 cm) [Log 3] and 1 rectangle 1 1/2 in x 4 1/2 in (3.8 cm x 11.4 cm) [Log 4].
- Cut 1 strip 1 1/2 in x WOF; subcut into 1 rectangle 1 1/2 in x 9 in (3.8 cm x 22.9 cm) [Log 7] and 1 rectangle 1 1/2 in x 10 1/2 in (3.8 cm x 26.7 cm) [Log 8].
Assembly
Block Assembly
- Lay out your pieces on a flat surface starting with the red center square. You will add the logs in a clockwise direction around the center, alternating between cream and navy.
- Take Log 1 (cream, 1 1/2 in x 2 in) and place it right sides together against the top edge of the red center square. Stitch using a 1/4 in (0.6 cm) seam allowance. Press the seam toward the strip you just added.
- Take Log 2 (cream, 1 1/2 in x 3 in) and place it along the right edge of the unit, covering the raw edge of the first log. Stitch, trim threads, and press outward.
- Take Log 3 (navy, 1 1/2 in x 3 in) and place it along the bottom edge of the unit. Stitch and press.
- Take Log 4 (navy, 1 1/2 in x 4 1/2 in) and place it along the left edge of the unit. Stitch and press.
💡 Designer Tip: Always press your seams toward the newly added strip to keep the back flat and prevent shadows showing through light fabrics.
- Continue adding the remaining logs in order: Log 5 (cream, 1 1/2 in x 6 in) across the top, Log 6 (cream, 1 1/2 in x 7 1/2 in) down the right side, Log 7 (navy, 1 1/2 in x 9 in) along the bottom, and Log 8 (navy, 1 1/2 in x 10 1/2 in) up the left side.
✅ Checkpoint: Your finished block should measure 12 1/2 in x 12 1/2 in (31.8 cm x 31.8 cm) square including seam allowances.
Size Variations
To make a larger project like a baby quilt or throw, simply sew multiple 12 in blocks together in a grid. Arranging four blocks with their dark sides meeting in the center creates a secondary diamond pattern, while setting them all in the same direction builds a large diagonal chevron stripe.
Care Instructions
Machine wash cold on a gentle cycle with like colors. Tumble dry on low heat or line dry in the shade to keep your fabrics crisp and bright.
FAQ
Why do I need to add the strips in a specific order?
Adding the logs in a continuous clockwise circle ensures that each new strip covers the raw edge of the previous one and maintains the square shape without distorting the bias edges.
Can I use pre-cut strips for this pattern?
Yes, standard 1 1/2 in jelly roll strips work wonderfully for Log Cabin blocks as long as you trim them to the exact lengths listed in the cutting instructions.
Which way should I press my seams?
Press your seams outward toward the darker fabric whenever possible, or consistently toward the newly added strip so the bulk is evenly distributed on the back of the block.
Happy Quilting!
I hope you enjoy piecing this classic block as much as I do. Save this pin on Pinterest to keep the pattern handy for your next sewing session. If you make one, I would love to see it: send me a photo through the contact page.