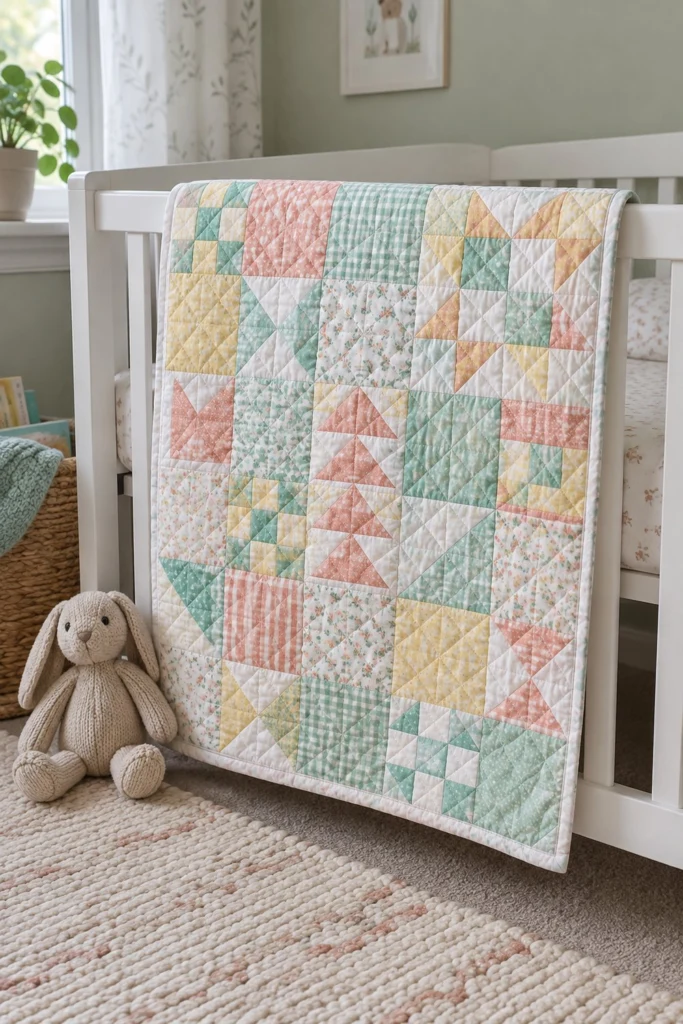
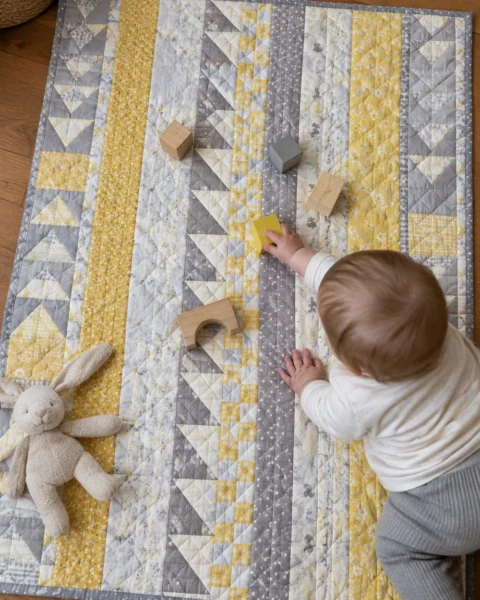
One charm pack plus a few extra squares make a crib-sized quilt. Straight-line quilting keeps it soft.
Quick Facts
- Skill level: Beginner
- Finished size: 32 in x 40 in (81.5 cm x 101.5 cm)
- Block size: 8 in (20.5 cm) finished
- Fabric: Assorted cotton prints, background solid white, mint green, and pale yellow
- Seam allowance: 1/4 in (0.6 cm)
- Time to make: Weekend
What Makes This Charm Square Baby Quilt Free Pattern Special
This baby quilt pattern uses standard 5 in charm squares, which means you spend less time cutting and more time sewing. The mix of floral prints, soft pinks, mint green ginghams, and pale yellows creates a gentle, heirloom look. Straight-line quilting through the center of the blocks keeps the quilt soft and drapey for a baby, without making the fabric stiff.
Finished Size
| Size Name |
Finished Width |
Finished Length |
Layout |
| Crib Quilt |
32 in (81.5 cm) |
40 in (81.5 cm) |
4 blocks across x 5 blocks down |
Fabric Requirements
| Fabric |
Used For |
Yards |
Metres |
| Assorted Pink Prints |
Block pieces and flying geese |
7/8 yd |
0.8 m |
| Mint Green Gingham and Prints |
Block pieces, HSTs, and borders |
1 1/4 yd |
1.2 m |
| Pale Yellow Prints |
Block pieces and cornerstones |
7/8 yd |
0.8 m |
| Floral Prints |
Block centers and four-patch units |
5/8 yd |
0.6 m |
| Solid White |
Background squares and HSTs |
2 5/8 yd |
2.4 m |
| Backing Fabric |
Quilt back |
1 1/2 yd |
1.4 m |
| Binding Fabric |
Quilt binding |
3/8 yd |
0.4 m |
| Batting |
Crib size (at least 38 in x 46 in) |
1 piece |
1 piece |
Cutting Instructions
- Assorted Pink Prints: Cut 4 strips 2 1/2 in x WOF (6.4 cm x WOF); subcut into twenty-four rectangles 2 1/2 in x 4 1/2 in (6.4 cm x 11.5 cm). Cut 4 squares 5 in x 5 in (12.5 cm x 12.5 cm).
- Mint Green Gingham and Prints: Cut 6 strips 2 1/2 in x WOF (6.4 cm x WOF); subcut into thirty-two squares 2 1/2 in x 2 1/2 in (6.4 cm x 6.4 cm). Cut 6 squares 5 in x 5 in (12.5 cm x 12.5 cm).
- Pale Yellow Prints: Cut 4 strips 2 1/2 in x WOF (6.4 cm x WOF); subcut into sixteen squares 2 1/2 in x 2 1/2 in (6.4 cm x 6.4 cm). Cut 4 squares 5 in x 5 in (12.5 cm x 12.5 cm).
- Floral Prints: Cut 4 strips 5 in x WOF (12.5 cm x WOF); subcut into sixteen squares 5 in x 5 in (12.5 cm x 12.5 cm).
- Solid White: Cut 12 strips 2 1/2 in x WOF (6.4 cm x WOF); subcut into eighty-four squares 2 1/2 in x 2 1/2 in (6.4 cm x 6.4 cm). Cut 12 squares 5 in x 5 in (12.5 cm x 12.5 cm).
- Binding Fabric: Cut 4 strips 2 1/2 in x WOF (6.4 cm x WOF) for the binding.
Assembly
Block Assembly
-
Half-Square Triangles (HSTs): Place one 5 in x 5 in (12.5 cm x 12.5 cm) solid white square and one 5 in x 5 in (12.5 cm x 12.5 cm) mint green square right sides together. Draw a diagonal line from corner to corner on the wrong side of the lighter fabric. Sew 1/4 in (0.6 cm) away from both sides of the drawn line. Cut along the drawn line to yield two HST units. Press seams toward the darker fabric and trim to 4 1/2 in x 4 1/2 in (11.5 cm x 11.5 cm). Make twenty-four HST units using white paired with pink, mint green, and pale yellow squares.
✅ Checkpoint: Each trimmed HST unit measures 4 1/2 in x 4 1/2 in (11.5 cm x 11.5 cm) unfinished.
-
Four-Patch Units: Sew two 2 1/2 in x 2 1/2 in (6.4 cm x 6.4 cm) floral squares to two 2 1/2 in x 2 1/2 in (6.4 cm x 6.4 cm) yellow or mint squares to create strip sets. Press seams open. Cut the strip sets across into 2 1/2 in (6.4 cm) segments, then join them to form four-patch blocks.
✅ Checkpoint: Each four-patch unit measures 4 1/2 in x 4 1/2 in (11.5 cm x 11.5 cm) unfinished.
-
Block Construction: Arrange four units (a mix of HSTs, four-patches, and solid 4 1/2 in squares) into a 2 x 2 grid to form one 8 1/2 in x 8 1/2 in (21.5 cm x 21.5 cm) unfinished block. Sew the units into rows, press the seams in opposite directions, and sew the rows together. Repeat to make twenty blocks total, following the layout shown in the photo.
✅ Checkpoint: Each completed block measures 8 1/2 in x 8 1/2 in (21.5 cm x 21.5 cm) unfinished.
Quilt Top Assembly
- Row Arrangement: Lay out your twenty finished blocks in 5 rows of 4 blocks each, matching the fabric placement in the photo.
- Sewing Rows: Sew the blocks in each row together using a 1/4 in (0.6 cm) seam allowance. Press row seams to the left in odd rows and to the right in even rows so the seams nest properly.
- Joining Rows: Pin the rows together, matching all intersecting seams. Sew the five rows together to complete the quilt center. Press all seams open or in one direction.
✅ Checkpoint: The quilt center measures 32 in x 40 in (81.5 cm x 101.5 cm) unfinished.
Quilting and Binding
- Layering: Cut your backing fabric in half to make two pieces about 48 in (122 cm) long, and sew them together along the long selvage edge with a 1/2 in (1.3 cm) seam to create a wider backing piece. Press the seam open. Lay the backing fabric face down on a flat surface, tape the edges smooth, place your batting on top, and center the quilted top face up over the batting.
- Basting: Pin or safety pin the layers together every 6 in (15 cm), starting from the center and working your way out toward the edges.
- Quilting: Quilt straight lines parallel to the block seams, spacing your quilting lines about 1 in (2.5 cm) apart or echoing the diagonal lines of the half-square triangles.
- Binding: Trim the excess batting and backing even with the quilt top. Sew your four 2 1/2 in x WOF (6.4 cm x WOF) binding strips end-to-end with diagonal seams. Press the binding strip in half lengthwise wrong sides together. Attach the binding to the front of the quilt with a 1/4 in (0.6 cm) seam, miter the corners, fold the raw edge over to the back of the quilt, and hand-stitch or machine-stitch it down securely.
Size Variations
- Blanket Size (32 in x 48 in / 81.5 cm x 122 cm): Add one additional row of 4 blocks to the bottom of the quilt top.
- Square Throw Size (40 in x 40 in / 101.5 cm x 101.5 cm): Add one column of 5 blocks to the right side of the quilt top.
Care Instructions
Machine wash cold on a gentle cycle with mild detergent. Tumble dry on low heat or lay flat to dry. The quilt will get softer and develop a cozy crinkled texture after the first wash.
FAQ
Can I use pre-cut charm packs for this baby quilt?
Yes. One standard charm pack containing forty-two 5 in x 5 in squares has enough squares for this project, just add your background solid white fabric for the half-square triangles.
How do I prevent my half-square triangles from stretching out of shape?
Press your seams flat before cutting, and avoid pulling or stretching the bias edges when you feed them through your sewing machine. A light spray of starch before cutting also helps keep the fabric stable.
What is the best needle to use for straight-line quilting?
A universal needle in size 80/12 or a dedicated quilting needle works well through all three layers without breaking threads.
Happy Quilting!
I hope you enjoy putting these sweet pastel prints together for a little one. Be sure to save this pin on Pinterest so you can find it later. If you make one, I would love to see it: send me a photo through the contact page.